
Start LifeOS in 10 Minutes
If you are new to LifeOS, do not start by configuring everything from scratch. Open the prepared example vault first, follow the 4 steps below, and learn the workflow by seeing it work.
This example vault uses the basic LifeOS plugin and is meant for practicing the record, theme, and task workflow in Obsidian.
Before You Start: App, Plugin, and Vault
- Obsidian is the app: download the installer for your operating system from the official Obsidian website, then install and open it. These instructions apply to Obsidian, not Aino.
- LifeOS is an Obsidian plugin: the example vault includes its plugin configuration. You do not need to follow the manual setup guide before trying this example.
- A vault is a folder containing notes: extract the ZIP, then open the actual folder in Obsidian. Do not select the ZIP or the outer Downloads folder.
Start with a local practice vault; cloud sync is not a prerequisite. You can follow the next step even if you have never used Obsidian. Read Core Concepts after trying the workflow.
Step 1: Download the Example Vault
Download the basic example vault:
After unzipping it, open the actual vault folder. It is usually named obsidian-example-lifeos-main, and it should contain the .obsidian settings folder.
Step 2: Open It in Obsidian
- Open Obsidian.
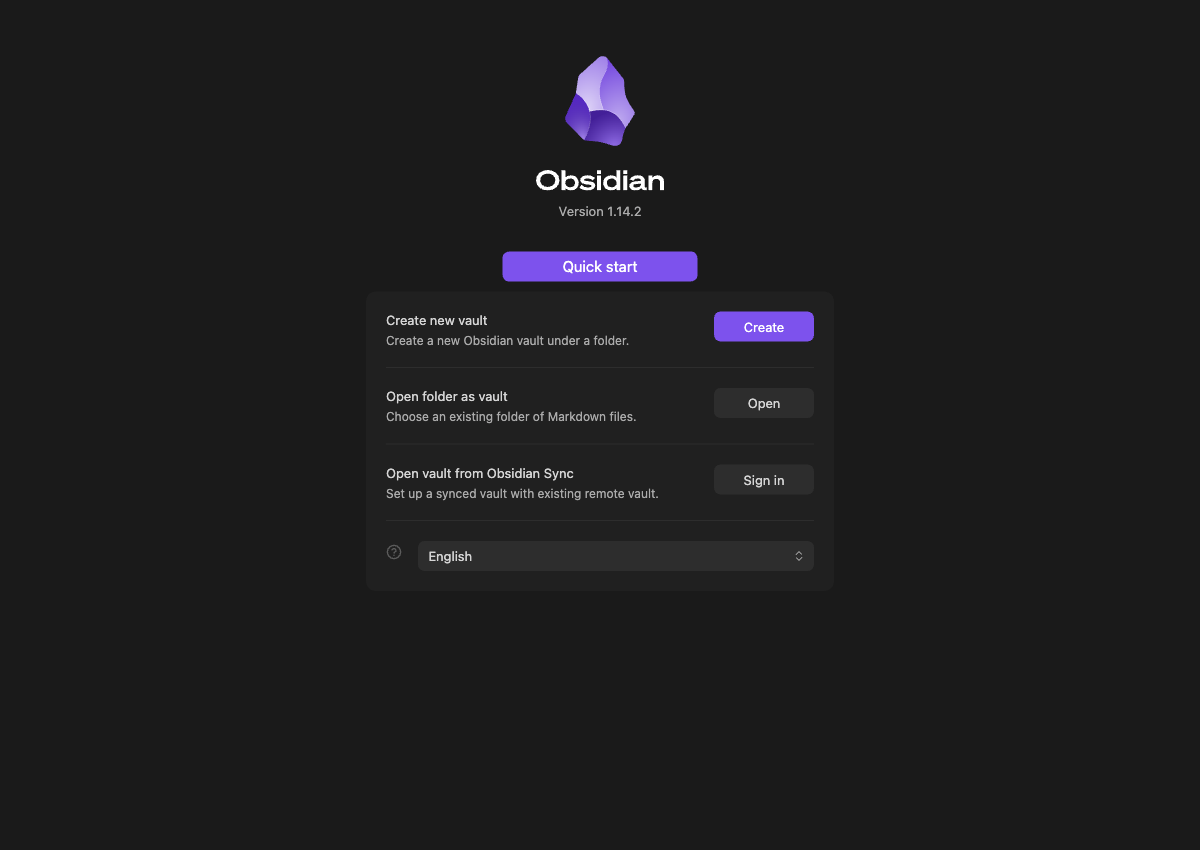
- Choose "Open folder as vault".
- Select the extracted
obsidian-example-lifeos-mainfolder. - If Obsidian asks whether you trust the vault, confirm the source before enabling community plugins.
On first launch, use the “Open folder as vault” option instead of creating an empty vault. This is the Obsidian start screen with no vaults added:
If you are unsure which folder to select, see Download Vault.
Step 3: Practice 3 Actions First
Do not read every concept before trying the workflow. Do these 3 actions first:
- Open today's daily note and write one record.
- Open or create a project / theme note and see how related tasks are collected.
- Open the task or index view and confirm that the task can be retrieved.
Once these work, you have understood the core LifeOS loop: capture -> connect to a theme -> review and move forward.
Step 4: Choose Your Next Step
- Want to stay with free features first? Read Basic Feature Overview.
- Already using Pro? Read Pro Version Feature Overview.
- Want to migrate your own Obsidian vault? Read manual setup and folder structure.
Practicing with the example vault first is more reliable than configuring your own vault on day one. Move your real notes only after each module makes sense.
If You Get Stuck
- No example notes appear: check whether you selected Downloads or an extra outer folder. The actual example vault contains both notes and a
.obsidianfolder, which your file manager may hide. - Notes appear but LifeOS features are missing: check “Settings → Community plugins” in Obsidian and enable the example's plugins only if you trust its source.
- Unsure whether Pro is required: the basic practice vault in this guide does not require a Pro activation code. See Pro Version Feature Overview when you are ready to consider it.
If you still cannot continue, include the step number, what the screen shows, and what you expected in your feedback. A screenshot without private notes helps us identify the issue.